Top 10 Locker Hooking Tips
colorcrazy locker hooking
I decided to write a blog post about locker hooking tips because as I create new projects small things pop up that I want to share. I did include a set of “Essential Locker Hooking Tips” in my Locking Loops book. This post will expand on those and adds more to the list. Use the tips that work for you.
I want to start off by stating: locker hooking techniques are what you make of them. There are no hard fast rules. Because in the name of art, and for the sake of creativity, we may want to alter the standard techniques.
The thing to remember is that we put passion, creativity and time into locker hooked projects, and we want to make sure we get the best results, and also ensure they are made to last. With that in mind, here are my TOP 10 locker hooking tips:

#1 Proper Strip Width or Fiber Weight
When cutting or choosing locker hooking fabrics, ribbons or fiber, it’s important to cut the correct width and/or choose the correct weight of fabric, fiber or yarn to match your canvas. If strips are too narrow, locking medium and canvas may show. If strips or fiber is too wide or heavy, your hooked canvas may buckle, and woven canvas may break up. It may end up warped. It’s important to test fabric or fibers to match canvas. Create small test swatches and adjust materials. Loops should be able to line up easily and cover canvas without buckling it. There are no set measurements for this because some fabrics are heavier than others. For quilting weight cotton (and these too can vary by vendor), I recommend 1/2″w for 5-Mesh, 3/ 4 – 1″w for 3.75 Mesh, and 1 – 1 1/2″w for 3-Mesh. Always test before you cut all of your fabric. If you don’t have time to cut your own, you can always buy Color Crazy’s pre-cut fabric strips.
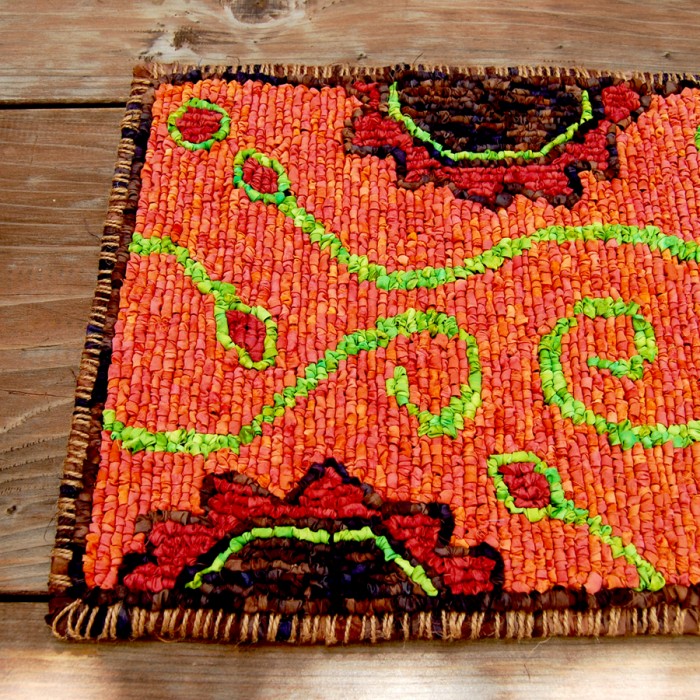
# 2 Securing Your Edges
The last thing you need is for all of that work to get destroyed during washing or wear. For rugs, it’s essential to secure your edges if you plan to machine wash. Always use the gentle cycle. I always recommend folding over 3 – 4 squares for rugs. I actually always fold over 4 squares no matter the canvas size. You can take this a step further and pull out your sewing machine to do a zig-zag stitch around the folded edge to secure it. For project designs that aren’t folded over–like floral accents or other cut out shapes–use a waterproof adhesive to secure edges.
#3 Framing: Crease a Row
To create firmer, sturdy edges, I always recommend creasing a row at the edge when folding canvas over. For example, for 5-mesh, you would crease a row and then the folded over piece would be 3 squares; total folded is 4 squares. This creates a nice firm edge to frame. When framing corners, use two or three stitches or more to ensure proper coverage. Rounded shapes are easier to frame than sharp corners. To frame a sharp corner and cover it properly, use a couple of drops of permanent adhesive as you’re whipstitching to frame. Use fingers to properly cover before glue dries.
#4 Consistent Loop Height
When pulling up loops of fabric, yarn or combination of fibers, make sure that they are at least an approximate 1/4″ (6mm) in height. Heights of 5/16″ or a bit higher are fine. If loops are shorter than 1/4″ or too tight, your locking medium will show through and sewing in tails to finish your project will be difficult. It’s important to make sure loop height is consistent as well for a smoother finish. Each time you pull up a loop give it a tug to match the previous loop. This will help create an even finished look. You can, of course, choose a very varied, textural, artsy design with altered loop length, but you still need to start with loops that are 1/4″ high.
# 5 Navigating Tight Corners: Be Gentle
Corners can be tough. It’s all of that folded canvas in a corner that makes it challenging. The key is: don’t apply too much force and also pull up one loop at a time. The best way is to wiggle the hook gently and press as you do this. It will eventually burrow through the canvas so you can pick up your loop. When pulling it through, do the same thing. Twist, wiggle and pull the hook under as you bring it through. It sometimes takes a couple of attempts but if you do it gently it works.
#6 Full Lofty Loops
To get the effect of fuller, loftier loops–this can be especially important when hooking a project with lighter fabric–double your locking medium, or choose a heavier twine or yarn. If you use a doubled locking medium, you can make things easier when sewing in tails, by clipping the first tail where it hangs, and sewing in the second tail.
#7 Finishing Small Projects
On smaller projects, or projects hooked on finer mesh canvas like 6-mesh or linen burlap, it’s often easier to use a tapestry needle or a petite locker hook to sew in tails, instead of your standard locker hook.
# 8 Creating Direction with Locking Medium
This is completely optional, but sometimes makes a difference with certain designs. When locker hooking “Free Form” designs–especially rounded designs, or swirls, you can introduce additional locking medium within the loops of the particular circle or swirl to pull the design together and create a sense of direction.
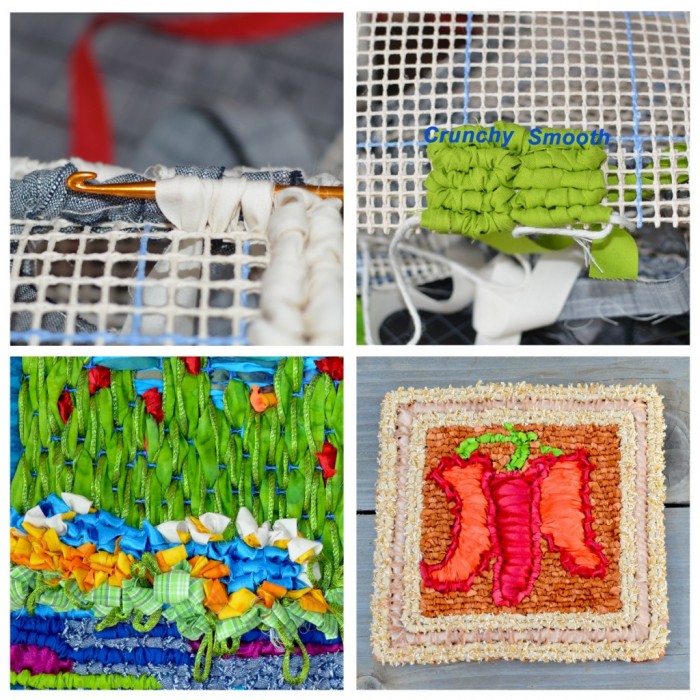
#9 Loops: Smooth or Crunchy?
The look of loops is important to some when using fabric. I like the feel of texture in my finished projects so I’m not too particular, but I have heard from readers that absolutely have to have a smooth finish–especially with rugs. To achieve this, always fold your fabric strip (fold edge over or completely in half) as you pull up loops. For a more textural finish, a crunchier look, if you will, always keep the strip flat and it will crunch as you pull it up. If you’re like me and don’t mind either way, just pull up loops as you go making sure fabric strips don’t get too twisted so you get proper coverage. I often end up with a mixture of both and I like this look a lot.
#10 Stitches & Locker Hooking
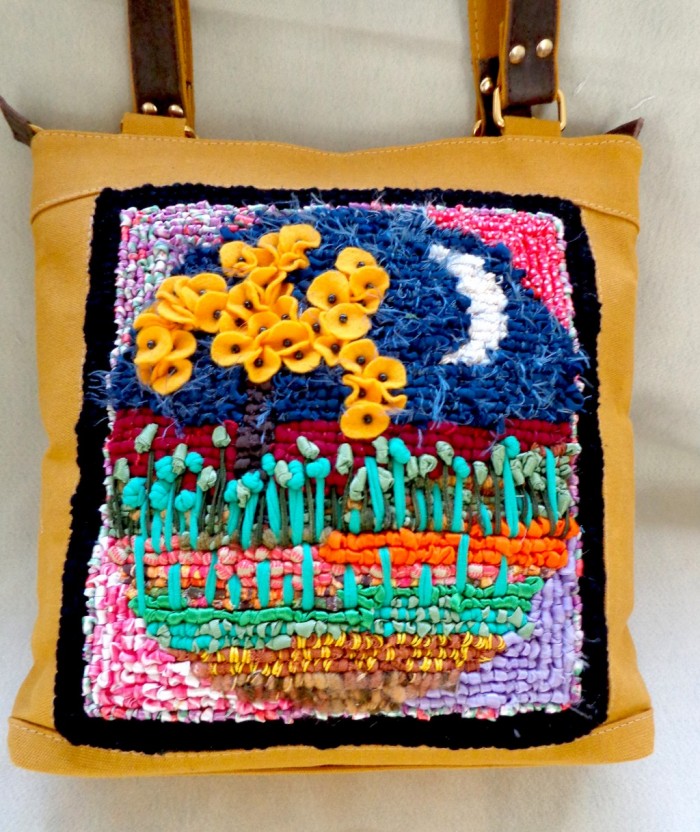
You can get creative with your tapestry needle to add simple, decorative stitches over your locker hooked projects or directly on the canvas. You can also add padded areas with the “ruched frames” technique introduced in the Locking Loops book. There are numerous things you can do with simple stitches to add layers of texture to mats, pillows or wall hangings, or to just complement your design (see Peppers Mat in image above.)Try using ribbons, yarn or twine to wrap edges. You can also use a simple whipstitch to assemble pieces and create tote bags, baskets and wearable designs. There’s no need to finish edges on locker hooked pieces that will be assembled. Be sure to whip stitch over joined edges a few times to cover properly. Your tapestry needle comes in very handy when stitching on pieces or assembling them together. Get creative and give this a try by adding decorative stitches, wrapping edges for added texture, or ruched frames, and mix it up a bit.
Use Facebook to Comment on this Post
The post Top 10 Locker Hooking Tips appeared first on Color Crazy.
Also in Color Crazy Blog
New Rug Canvas Arrives at Color Crazy
colorcrazy locker hooking
I have to admit I panicked. Late last year, rug canvas was no where to be found in the U.S. The only supplier of wholesale canvas had decided to close their doors and I was in the middle of some new designs. Rug canvas is an essential component for my work and the kits I...
The post New Rug Canvas Arrives at Color Crazy appeared first on Color Crazy.
Floral Designs for Hooking & Stitching
colorcrazy locker hooking
When I discovered that locker hooking as a needle craft, was the perfect technique for creating flower textures, I knew I had to get creative and produce some super colorful and textural designs. I always admired the texture you can achieve with traditional rug hooking using a latch hook, and beautiful embroidered florals. Turns out...
The post Floral Designs for Hooking & Stitching appeared first on Color Crazy.
Locker Hook a Spring Garden Bouquet
colorcrazy locker hooking
I love the colors of spring and the vibrant energy in the garden when everything is blooming. There’s so much to choose from for inspiration. So of course it took me forever to decide on the Spring design for this series of Garden Panels. I started out with a completely different design and must have...
The post Locker Hook a Spring Garden Bouquet appeared first on Color Crazy.